Interact with the Front-end
Creating a user-friendly web interface for smart contracts on the Rootstock network can enhance user interaction. Here, we'll focus on using ethers.js, a popular Ethereum library, for connecting your smart contracts to a web front-end.
Project Setup
- Create a new folder called
frontendand navigate to the directory:
  mkdir frontend
  cd frontend
Note: If you use the quick start repo on
master, there's already a frontend folder. You cancdinto the frontend directory.
- In the frontend directory, initialize a Node.js Project:
npm init -y- Install Ethers.js:
npm install --save ethersCreate HTML File
- Update HTML File
- In the frontend directory, open the
index.htmlfile:- Copy the code snippet below and paste it in your html file:
<!DOCTYPE html>
<html lang="en">

<head>
  <meta charset="UTF-8">
  <meta name="viewport" content="width=device-width, initial-scale=1.0">
  <title>Web3 App with Ethers.js</title>
</head>

<body>
</body>

</html>
- Copy the code snippet below and paste it in your html file:
- In the frontend directory, open the
- Import Ethers
- To import the Ethers library to interact with the wallet to the network, copy the code snippet below and paste it in the
<head>section of your html file:<script src="https://cdn.ethers.io/lib/ethers-5.2.umd.min.js"></script>
- To import the Ethers library to interact with the wallet to the network, copy the code snippet below and paste it in the
- Create HTML elements inside the body
- Create a button to trigger the function for connecting the wallet.
- Create a button to trigger the function to get balance.
- Create a div element to show the answer for the address connected.
- Create a div element to show the answer for wallet balance.
<body>
  <div>
    <h1>Connect to Rootstock Network</h1>
    <button id="connectButton">Connect Wallet</button>
    <button id="getBalanceButton" disabled>Get MTK Balance</button>
    <div id="walletAddress"></div>
    <div id="walletBalance"></div>
  </div>
</body>
- Import javascript file
- Finally, to import the javascript library that we will create in a further step, copy the code snippet below and paste it in the
<body>section of your html file::<script src="app.js"></script>
- Finally, to import the javascript library that we will create in a further step, copy the code snippet below and paste it in the
Your index.html file should now look like the index.html file on GitHub.
Create JavaScript Functions
- Create basic javascript function
- In the frontend directory, open the
app.jsfile. - Copy the
MyToken.jsonartifact file generated when building the contracts in/artifacts/contracts/MyToken.sol/MyToken.json. - Copy the
networks.jsonfile. You can get the file from this link. - Create the function to wait until the DOM is loaded, instance the HTML elements (buttons and divs), and declare some variables:
document.addEventListener('DOMContentLoaded', function () {
  // Instantiating HTML elements
  const connectButton = document.getElementById('connectButton');
  const getBalanceButton = document.getElementById('getBalanceButton');
  const walletAddressDiv = document.getElementById('walletAddress');
  const walletBalanceDiv = document.getElementById('walletBalance');
  // Instantiating variables
  let provider, account, myTokenContract;
  let contractABI = [];
  let networks = {};
  const contractAddress = 'Replace with your contract\'s address'; // E.g. 0xa6fb392538BaC56e03a900BFDE22e76C05fb5122
});
- In the frontend directory, open the
- Add a function that fetches the ABI and stores it in a variable
async function fetchExternalFiles() { // Place MyToken.json generated in artifacts after compiling the contracts let response = await fetch('MyToken.json'); const data = await response.json(); contractABI = data.abi; // Place networks.json to set the network automatically with the checkNetwork() function // You can set it manually instead following this guide https://dev.rootstock.io/kb/rootstock-metamask/ response = await fetch('networks.json'); networks = await response.json(); } - Add a function that checks the wallet is connected to the Rootstock network
async function checkNetwork() { try { // Make sure Metamask is installed if (!window.ethereum){ alert('Please install Metamask!'); return; } // Switch network await window.ethereum.request({ method: 'wallet_switchEthereumChain', params: [{ chainId: networks.rskTestnet.chainId }], }); } catch (error) { // This error code indicates that the chain has not been added to Metamask if (error.code === 4902) { // Trying to add new chain to Metamask await window.ethereum.request({ method: 'wallet_addEthereumChain', params: [networks.rskTestnet], }); } else { // Rethrow all other errors throw error; } } } - Call the fetchABI function that loads the ABI and connects the wallet to the network
// Get the required data and set the events fetchExternalFiles().then(() => { // Connect button event connectButton.addEventListener('click', async function () { // Check the network is set properly await checkNetwork(); if (typeof window.ethereum !== 'undefined') { try { // Get the account from Metamask const accounts = await window.ethereum.request({ method: 'eth_requestAccounts' }); account = accounts[0]; // Update the front with the account address walletAddressDiv.innerHTML = `Connected account: ${account}`; // Get the network provider provider = new ethers.providers.Web3Provider(window.ethereum); // Get the signer for network interaction signer = provider.getSigner(); // Activates the getBalanceButton connectButton.disabled = true; getBalanceButton.disabled = false; } catch (error) { console.error("Error connecting to MetaMask", error); walletAddressDiv.innerHTML = `Error: ${error.message}`; } } else { walletAddressDiv.innerHTML = 'Please install MetaMask!'; } }); - Add a function responding to the click event on the get balance button.
// Get balance button event getBalanceButton.addEventListener('click', async function () { // Verify contractAddress is a valid address if (!ethers.utils.isAddress(contractAddress)){ alert('Please verify that contractAddress is set'); return; } // Instantiate the contract myTokenContract = new ethers.Contract(contractAddress, contractABI, signer); // Check if the contract is instatiated properly if (myTokenContract) { // Obtains the user balance const balance = await myTokenContract.balanceOf(account); // Show the user balance walletBalanceDiv.innerHTML = `MyToken Balance: ${balance} MTK`; } }); - View the Complete Code
- GitHub Link
document.addEventListener('DOMContentLoaded', function () {
  // Instantiating HTML elements
  const connectButton = document.getElementById('connectButton');
  const getBalanceButton = document.getElementById('getBalanceButton');
  const walletAddressDiv = document.getElementById('walletAddress');
  const walletBalanceDiv = document.getElementById('walletBalance');
  // Instantiating variables
  let provider, account, myTokenContract;
  let contractABI = [];
  let networks = {};
  const contractAddress = 'Replace with your contract\'s address'; // E.g. 0xa6fb392538BaC56e03a900BFDE22e76C05fb5122

  /**
* Load data from external JSON files
*/
  async function fetchExternalFiles() {
    // Place MyToken.json generated in artifacts after compiling the contracts
    let response = await fetch('MyToken.json');
    const data = await response.json();
    contractABI = data.abi;
    // Place networks.json to set the network automatically with the checkNetwork() function
    // You can set it manually instead following this guide https://dev.rootstock.io/kb/rootstock-metamask/
    response = await fetch('networks.json');
    networks = await response.json();
  }

  /**
* Check and set network automatically in case it is not already done
*/
  async function checkNetwork() {
    try {
      // Make sure Metamask is installed
      if (!window.ethereum){
        alert('Please install Metamask!');
        return;
      }
      // Switch network
      await window.ethereum.request({
        method: 'wallet_switchEthereumChain',
        params: [{ chainId: networks.rskTestnet.chainId }],
      });
    } catch (error) {
      // This error code indicates that the chain has not been added to Metamask
      if (error.code === 4902) {
        // Trying to add new chain to Metamask
        await window.ethereum.request({
          method: 'wallet_addEthereumChain',
          params: [networks.rskTestnet],
        });
      } else {
        // Rethrow all other errors
        throw error;
      }
    }
  }

  // Get the required data and set the events
  fetchExternalFiles().then(() => {
    // Connect button event
    connectButton.addEventListener('click', async function () {
      // Check the network is set properly
      await checkNetwork();
      if (typeof window.ethereum !== 'undefined') {
        try {
          // Get the account from Metamask
          const accounts = await window.ethereum.request({ method: 'eth_requestAccounts' });
          account = accounts[0];
          // Update the front with the account address
          walletAddressDiv.innerHTML = `Connected account: ${account}`;
          // Get the network provider
          provider = new ethers.providers.Web3Provider(window.ethereum);
          // Get the signer for network interaction
          signer = provider.getSigner();
          // Activates the getBalanceButton
          connectButton.disabled = true;
          getBalanceButton.disabled = false;
        } catch (error) {
          console.error("Error connecting to MetaMask", error);
          walletAddressDiv.innerHTML = `Error: ${error.message}`;
        }
      } else {
        walletAddressDiv.innerHTML = 'Please install MetaMask!';
      }
    });

    // Get balance button event
    getBalanceButton.addEventListener('click', async function () {
      // Verify contractAddress is a valid address
      if (!ethers.utils.isAddress(contractAddress)){
        alert('Please verify that contractAddress is set');
        return;
      }
      // Instantiate the contract
      myTokenContract = new ethers.Contract(contractAddress, contractABI, signer);
      // Check if the contract is instatiated properly
      if (myTokenContract) {
        // Obtains the user balance
        const balance = await myTokenContract.balanceOf(account);
        // Show the user balance
        walletBalanceDiv.innerHTML = `MyToken Balance: ${balance} MTK`;
      }
    });
  });
});
- GitHub Link
Run the frontend
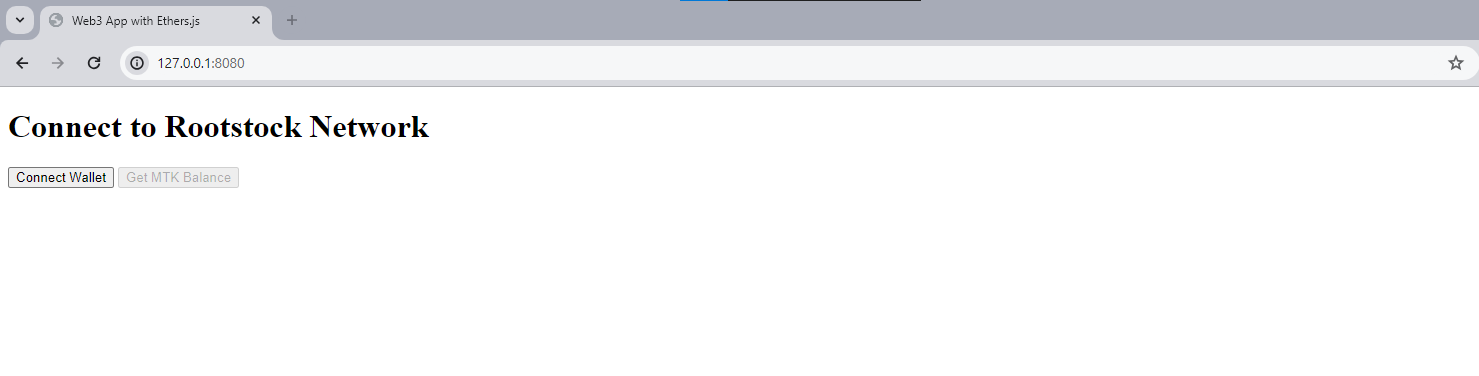
To run the frontend, execute a local web server to test the HTML file using the following command:
npx http-serverNavigate to the URL: http://127.0.0.1:8080 to test the code in the browser and you should get a result similar to the image below:
- Tips: Ensure local hardhat network is running. Run
npx hardhat nodein the root directory to start the local network. See section on Troubleshooting and Common Errors to fix common errors.- Note: You can view and run the complete project from the
feat/completebranch. To do so, git checkout into thefeat/completebranch, runcd frontend, runnpm install, then runnpx http-serverto view and interact with the smart contract from the frontend.
Resources
These tools are specifically tailored for Web3 development, and they can simplify the integration of blockchain functionaity into web interfaces. Here are a few recommended tools and libraries that are popular in the Web3 space, along with brief descriptions:
- RainbowKit
- RainbowKit is a React library offering a comprehensive wallet connection solution. It provides a beautiful, easy-to-use wallet connection interface that supports multiple wallets and networks.
- Why Use It: It is great for projects where you want a seamless and user-friendly wallet connection experience. It's easy to integrate and manage, especially in React-based applications.
- Web3Modal
- Web3Modal is a JavaScript library that provides a simple, unified wallet connection modal for Web3 applications. It supports various wallet providers and can be used with different Web3 libraries.
- Why Use It: If you need to start using React or want a framework-agnostic wallet connection solution, Web3Modal is an excellent choice. It’s customizable and works well with both web3.js and ethers.js.
- Wagmi
- Wagmi is a React Hooks for Ethereum set that simplifies interactions with ethers.js. It provides hooks for wallet connection, contract interaction, balances, and more.
- Why Use It: For React developers who prefer a hooks-based approach, Wagmi offers an elegant way to integrate Ethereum functionality. It makes managing state and blockchain interactions more intuitive.
- Moralis
- Moralis is a fully managed backend platform for Web3 and blockchain applications. It offers a suite of tools for authentication, real-time databases, cloud functions, and syncing blockchain data.
- Why Use It: It can be a time-saver to build a more comprehensive application with backend support. It handles much of the backend complexity and lets you focus on front-end development.