Deploy Smart Contract
In this section, we'll deploy your token contract to your local environment and also deploy and interact with the contract on the Rootstock network.
Step 1: Configure Deployment File
To configure your deployment file:
- Navigate to the
scriptsdirectory in the root directory of the quick start repo:
cd scripts- In the scripts directory, open the
deploy.jsdeployment file:
To deploy myToken contract, copy the deployment script below and paste it in your deployment file or see the deploy.js file on GitHub.
   async function main() {
   const [deployer] = await ethers.getSigners();

   console.log("Deploying contracts with the account:", deployer.address);

   const MyToken = await ethers.getContractFactory("MyToken");
   const myToken = await MyToken.deploy(1000);

   console.log("Token address:", myToken.address);
   }

   main().catch((error) => {
   console.error(error);
      process.exitCode = 1;
   });
Step 2: Run the Hardhat Network Locally
Note: You need to have sufficient RBTC in your deploying account for gas fees. See section on Fund your account.
To run the Hardhat network locally:
- Start the Hardhat network
- Hardhat comes with a built-in Ethereum network for development. Run the following command in your project's root directory to start it.
This command will start a local blockchain network and display a list of available accounts and private keys:
npx hardhat node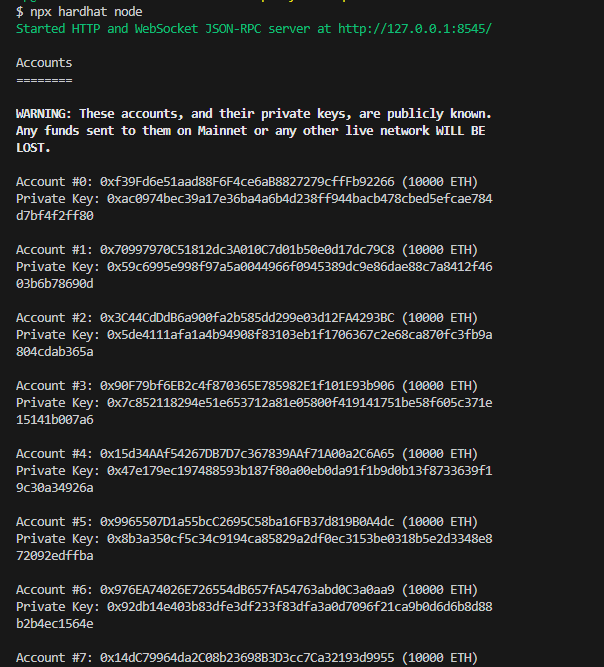
- Hardhat comes with a built-in Ethereum network for development. Run the following command in your project's root directory to start it.
- Deploy your contract to the local network
-
Deploy your contract to the local Hardhat network, in another terminal or command prompt, run the command below in the root directory:
npx hardhat run --network hardhat scripts/deploy.jsThis should give a result similar to the following:
npx hardhat run --network hardhat scripts/deploy.js

Deploying contracts with the account: 0xf39Fd6e51aad88F6F4ce6aB8827279cffFb92266
Token address: 0x5FbDB2315678afecb367f032d93F642f64180aa3
-
Step 3: Deploy Your Contract on Rootstock Network
Follow these steps to deploy your contract on Rootstock network:
- Use Hardhat's run command to deploy your contract, depending on the desired network. You can choose to deploy to either Rootstock's Testnet or Mainnet.
To deploy to the Rootstock Testnet, run:
npx hardhat run --network rskTestnet scripts/deploy.jsThis should return the following:
% npx hardhat run --network rskTestnet scripts/deploy.js
Deploying contracts with the account: 0xA210D04d707f6beBF914Cb1a57199Aebe7B40380
Token address: 0xc6EcBe0F6643825FD1AAfc03BEC999014759a279- To deploy to the Rootstock Mainnet, run:
npx hardhat run --network rskMainnet scripts/deploy.jsConfigure MetaMask
- Install Metamask
- If you haven't already, you can use the metamask-landing.rifos.org tool to download/install Metamask, and add Rootstock custom network or follow the steps in Configure Network and Token.
Step 4: Connect Remix to Rootstock Testnet (Optional)
-
Open Remix IDE
- Go to Remix IDE in your browser.
-
Connect MetaMask to Remix:
- In Remix, go to the Deploy & run transactions plugin.
- In the Environment dropdown, select Injected Provider.
- This will connect to MetaMask. Make sure MetaMask is on the
RSK Testnetnetwork that you configured earlier.
Interact with the Deployed Contract on Remix
To interact with your deployed contract on Rootstock network:
- Load Your Deployed Contract
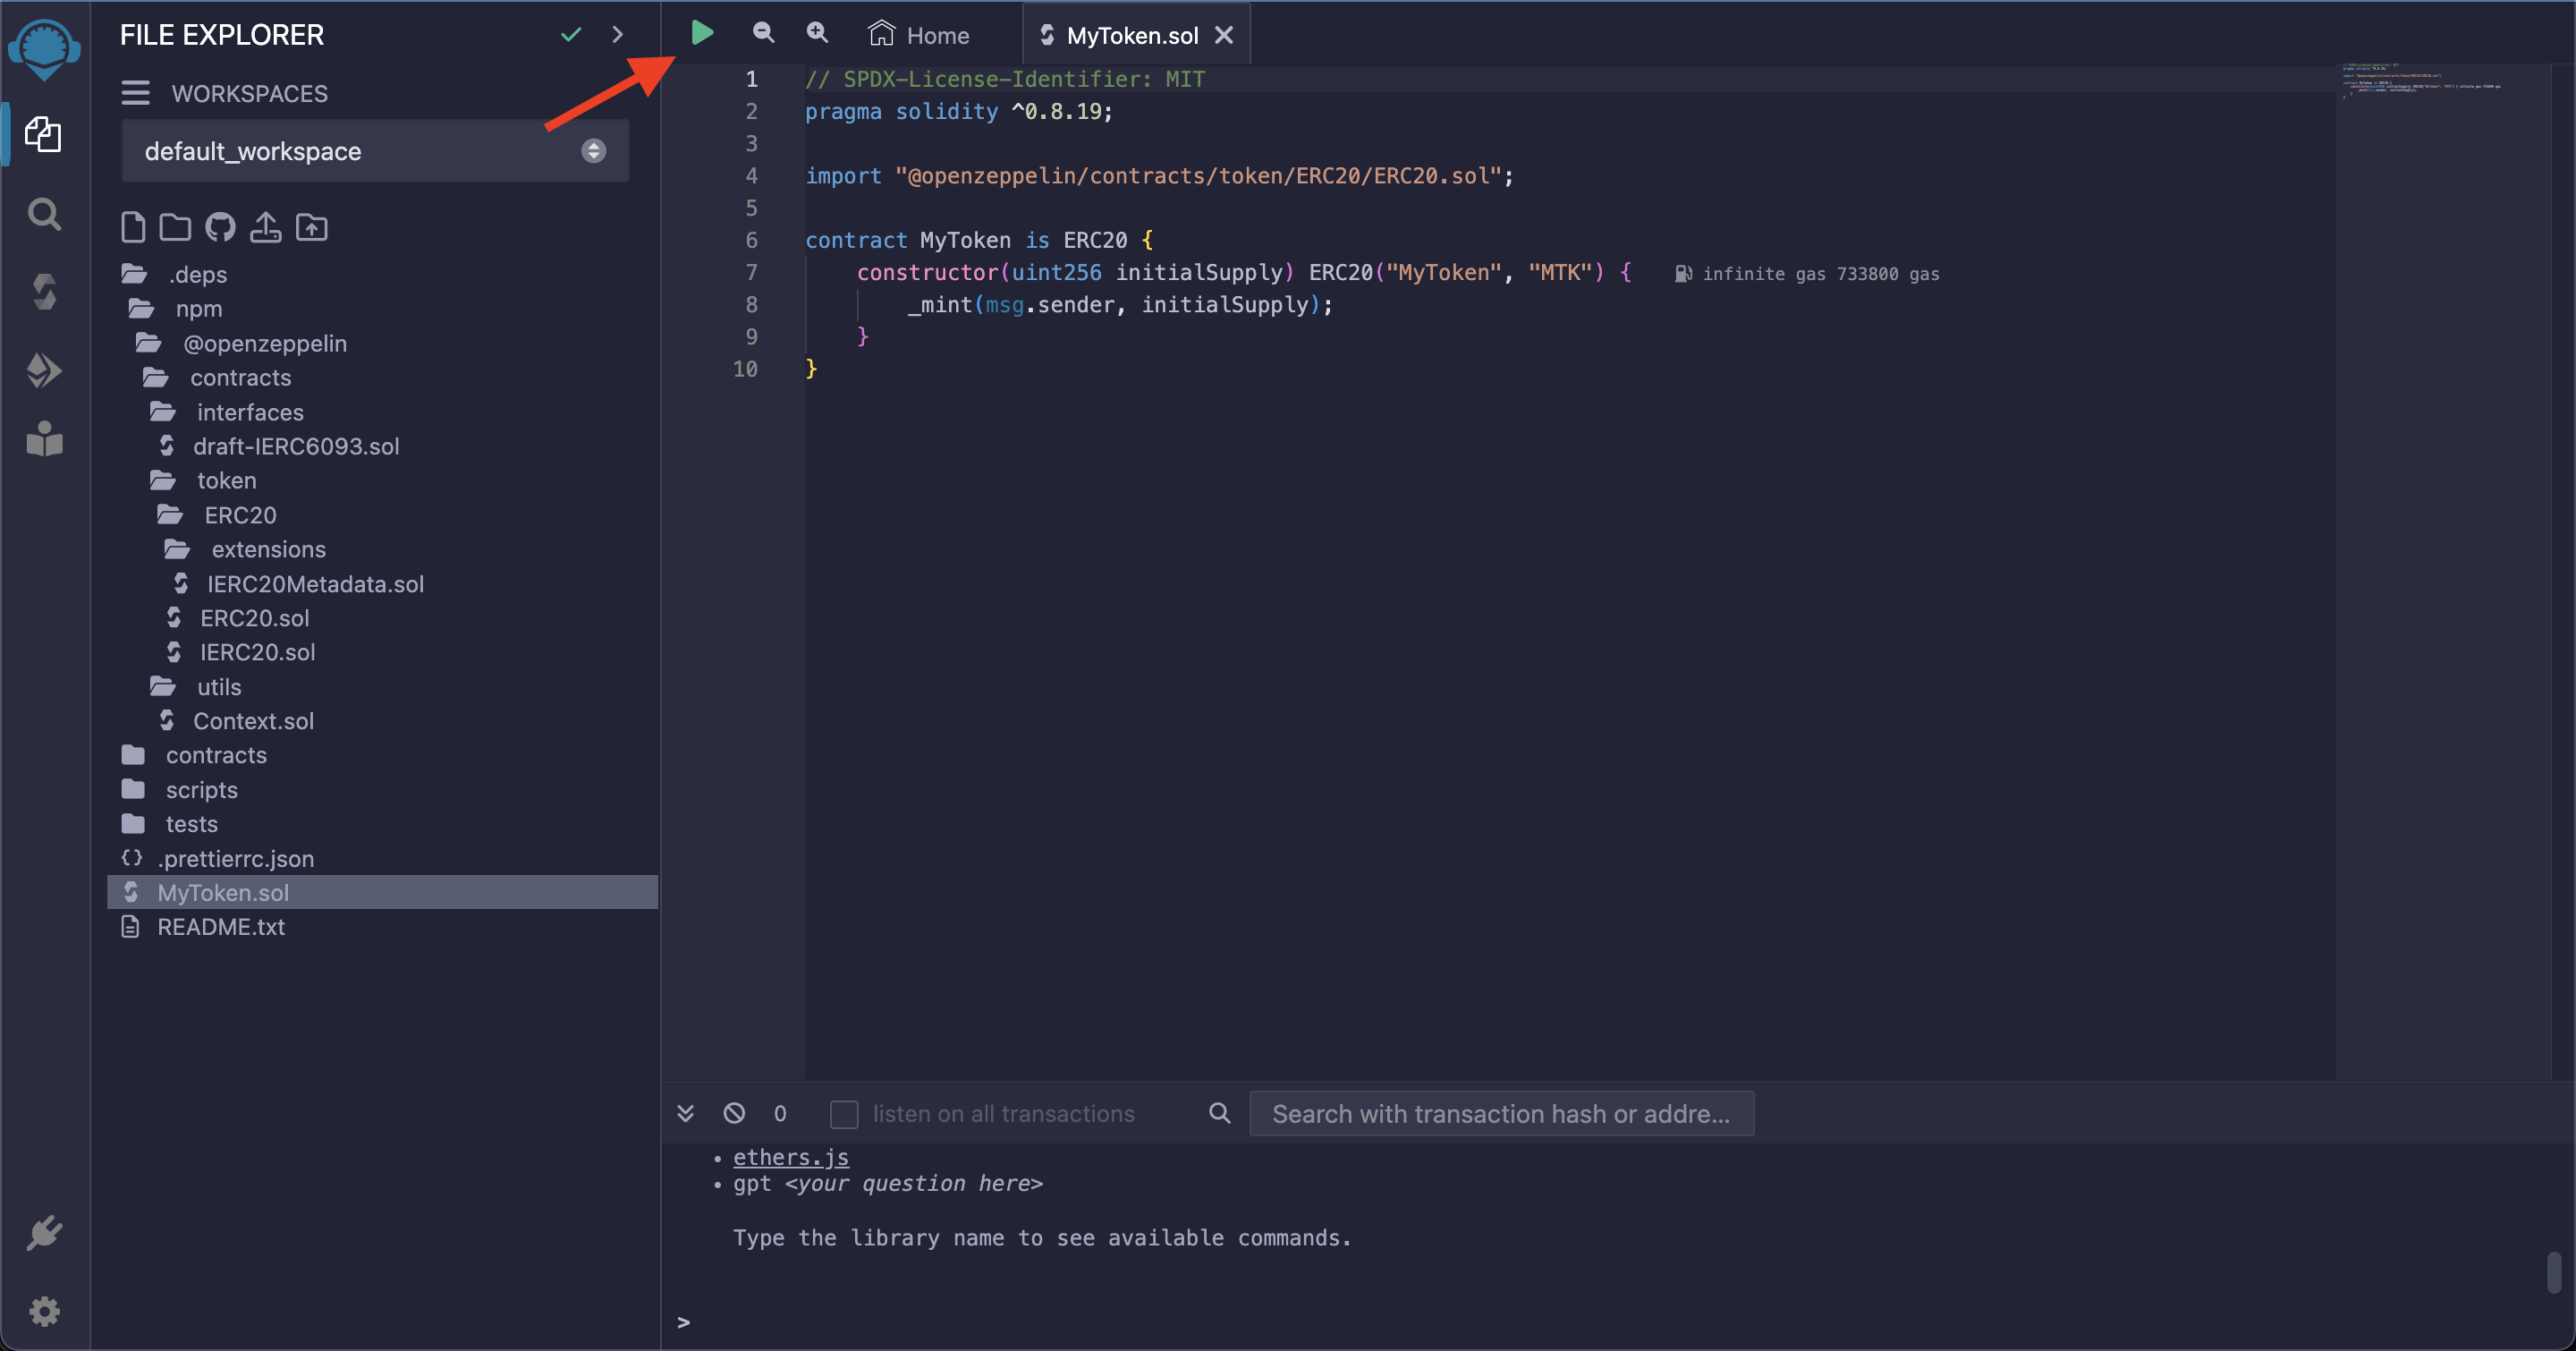
- Import the
myToken.solfile into remix and compile.
- Import the
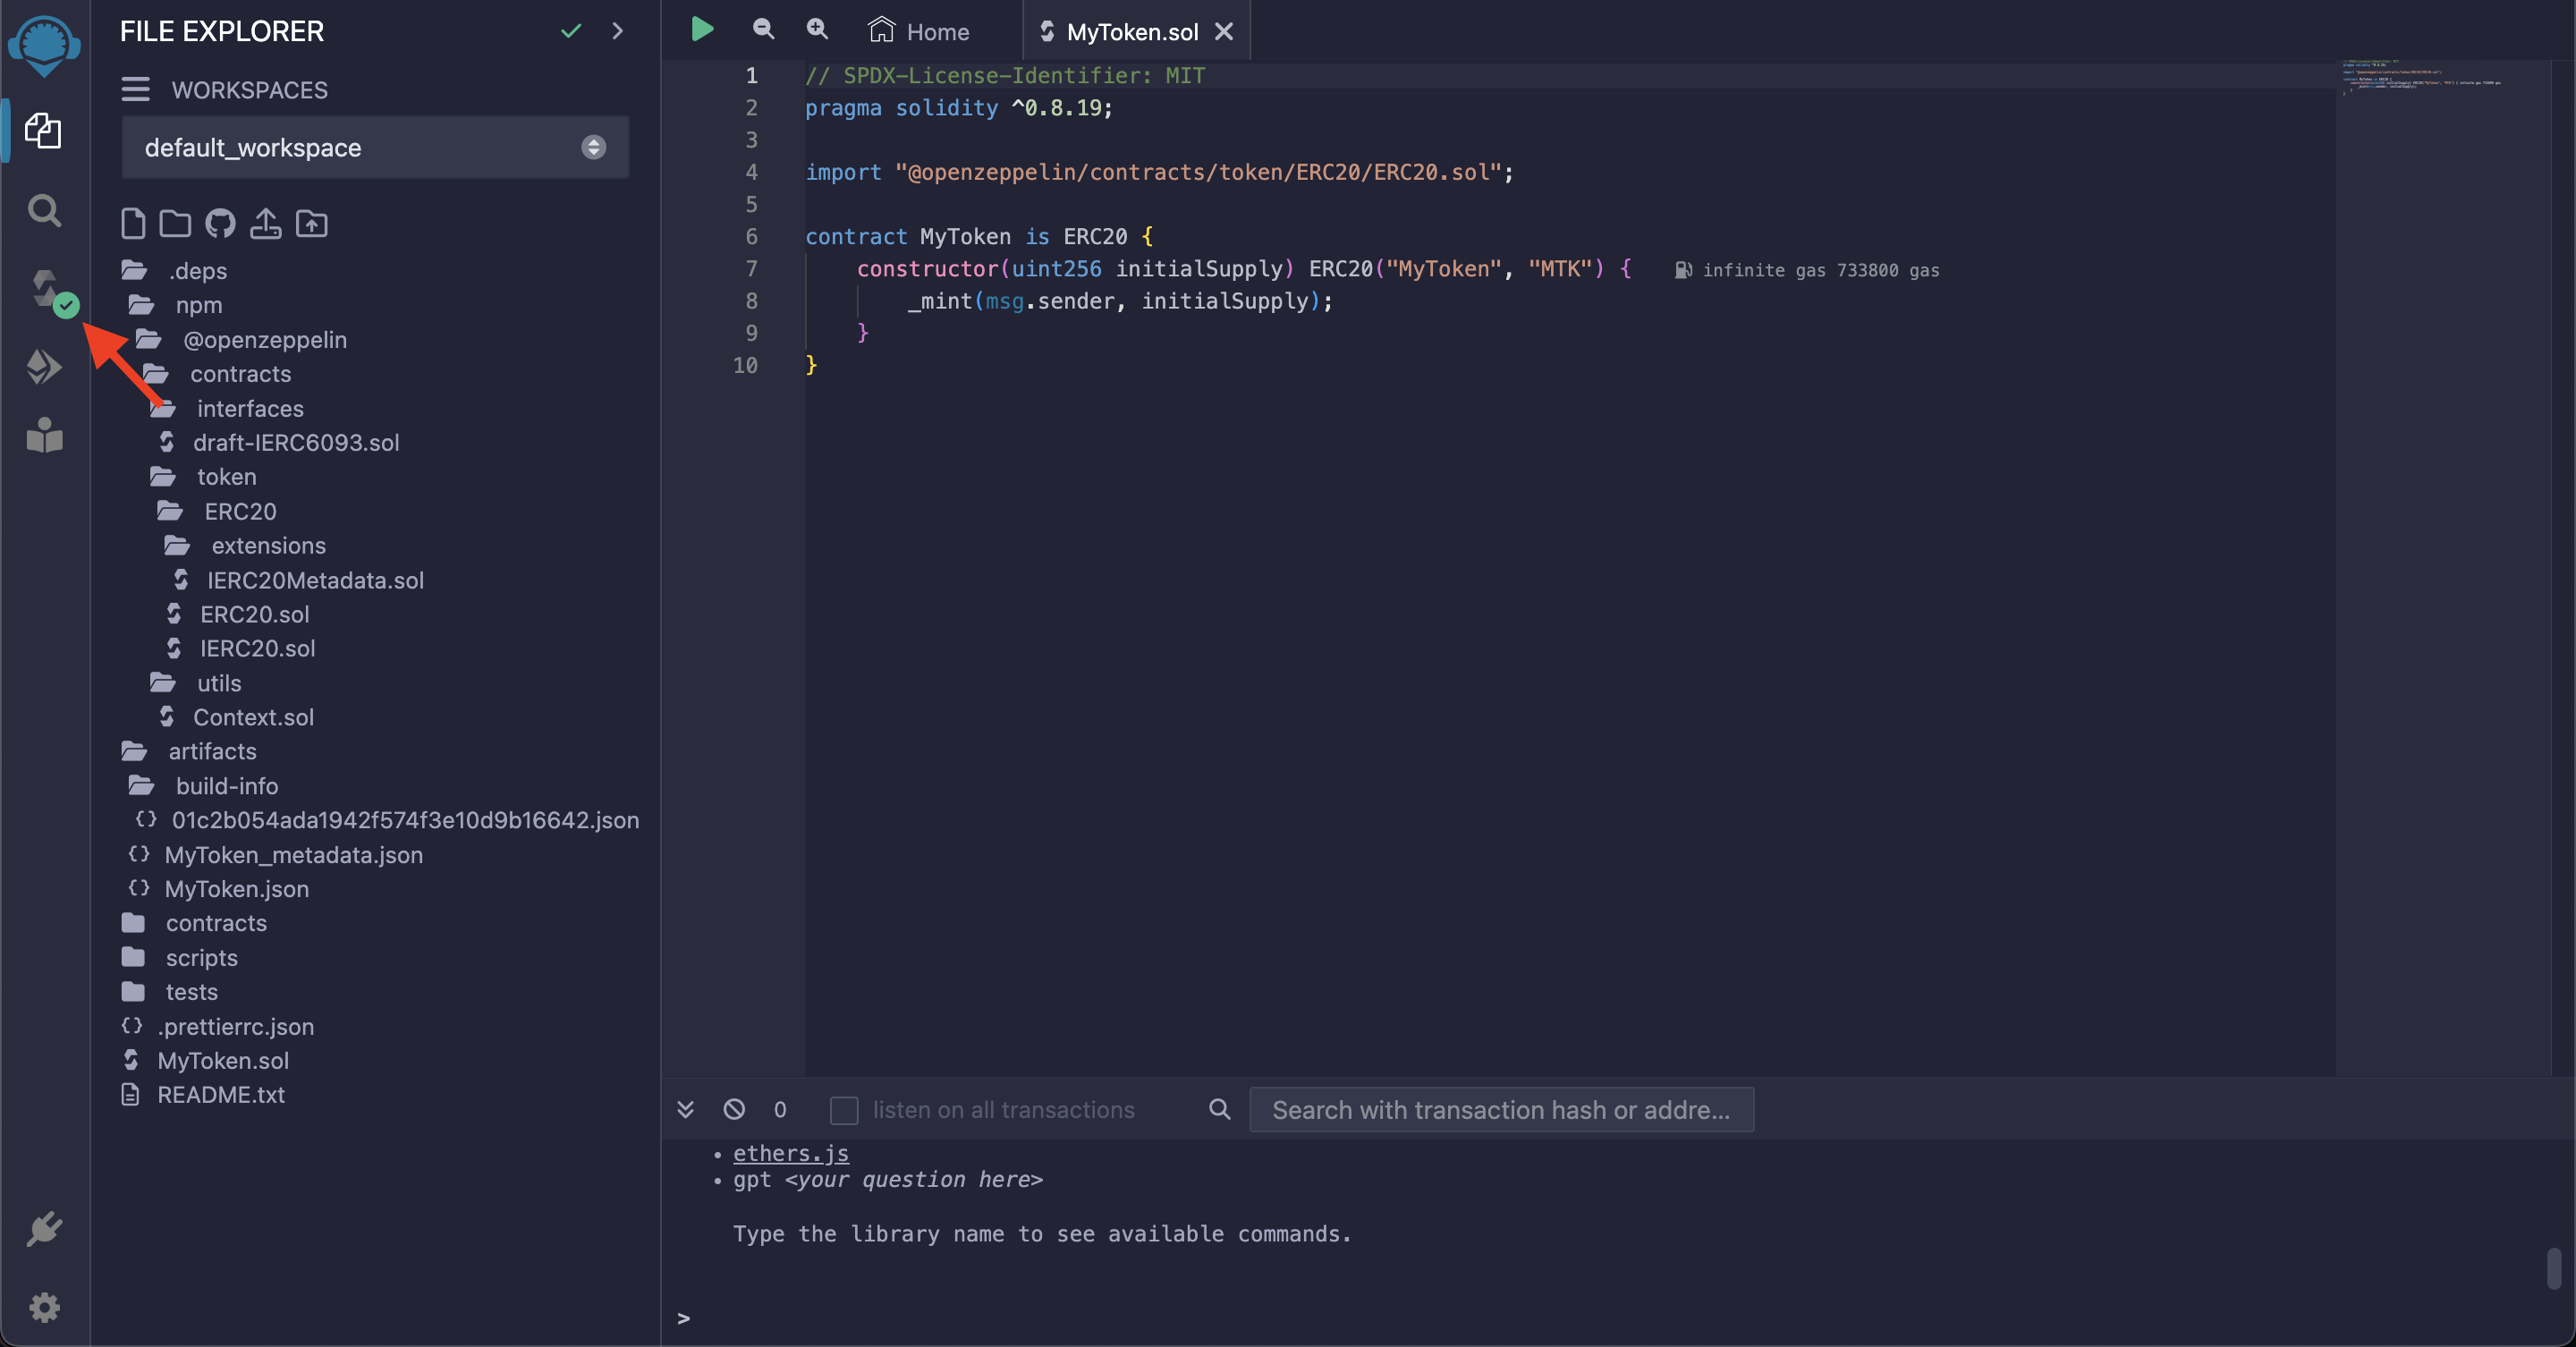
- Once compiled, you should see the checkmark and solidiity file loaded into Remix.
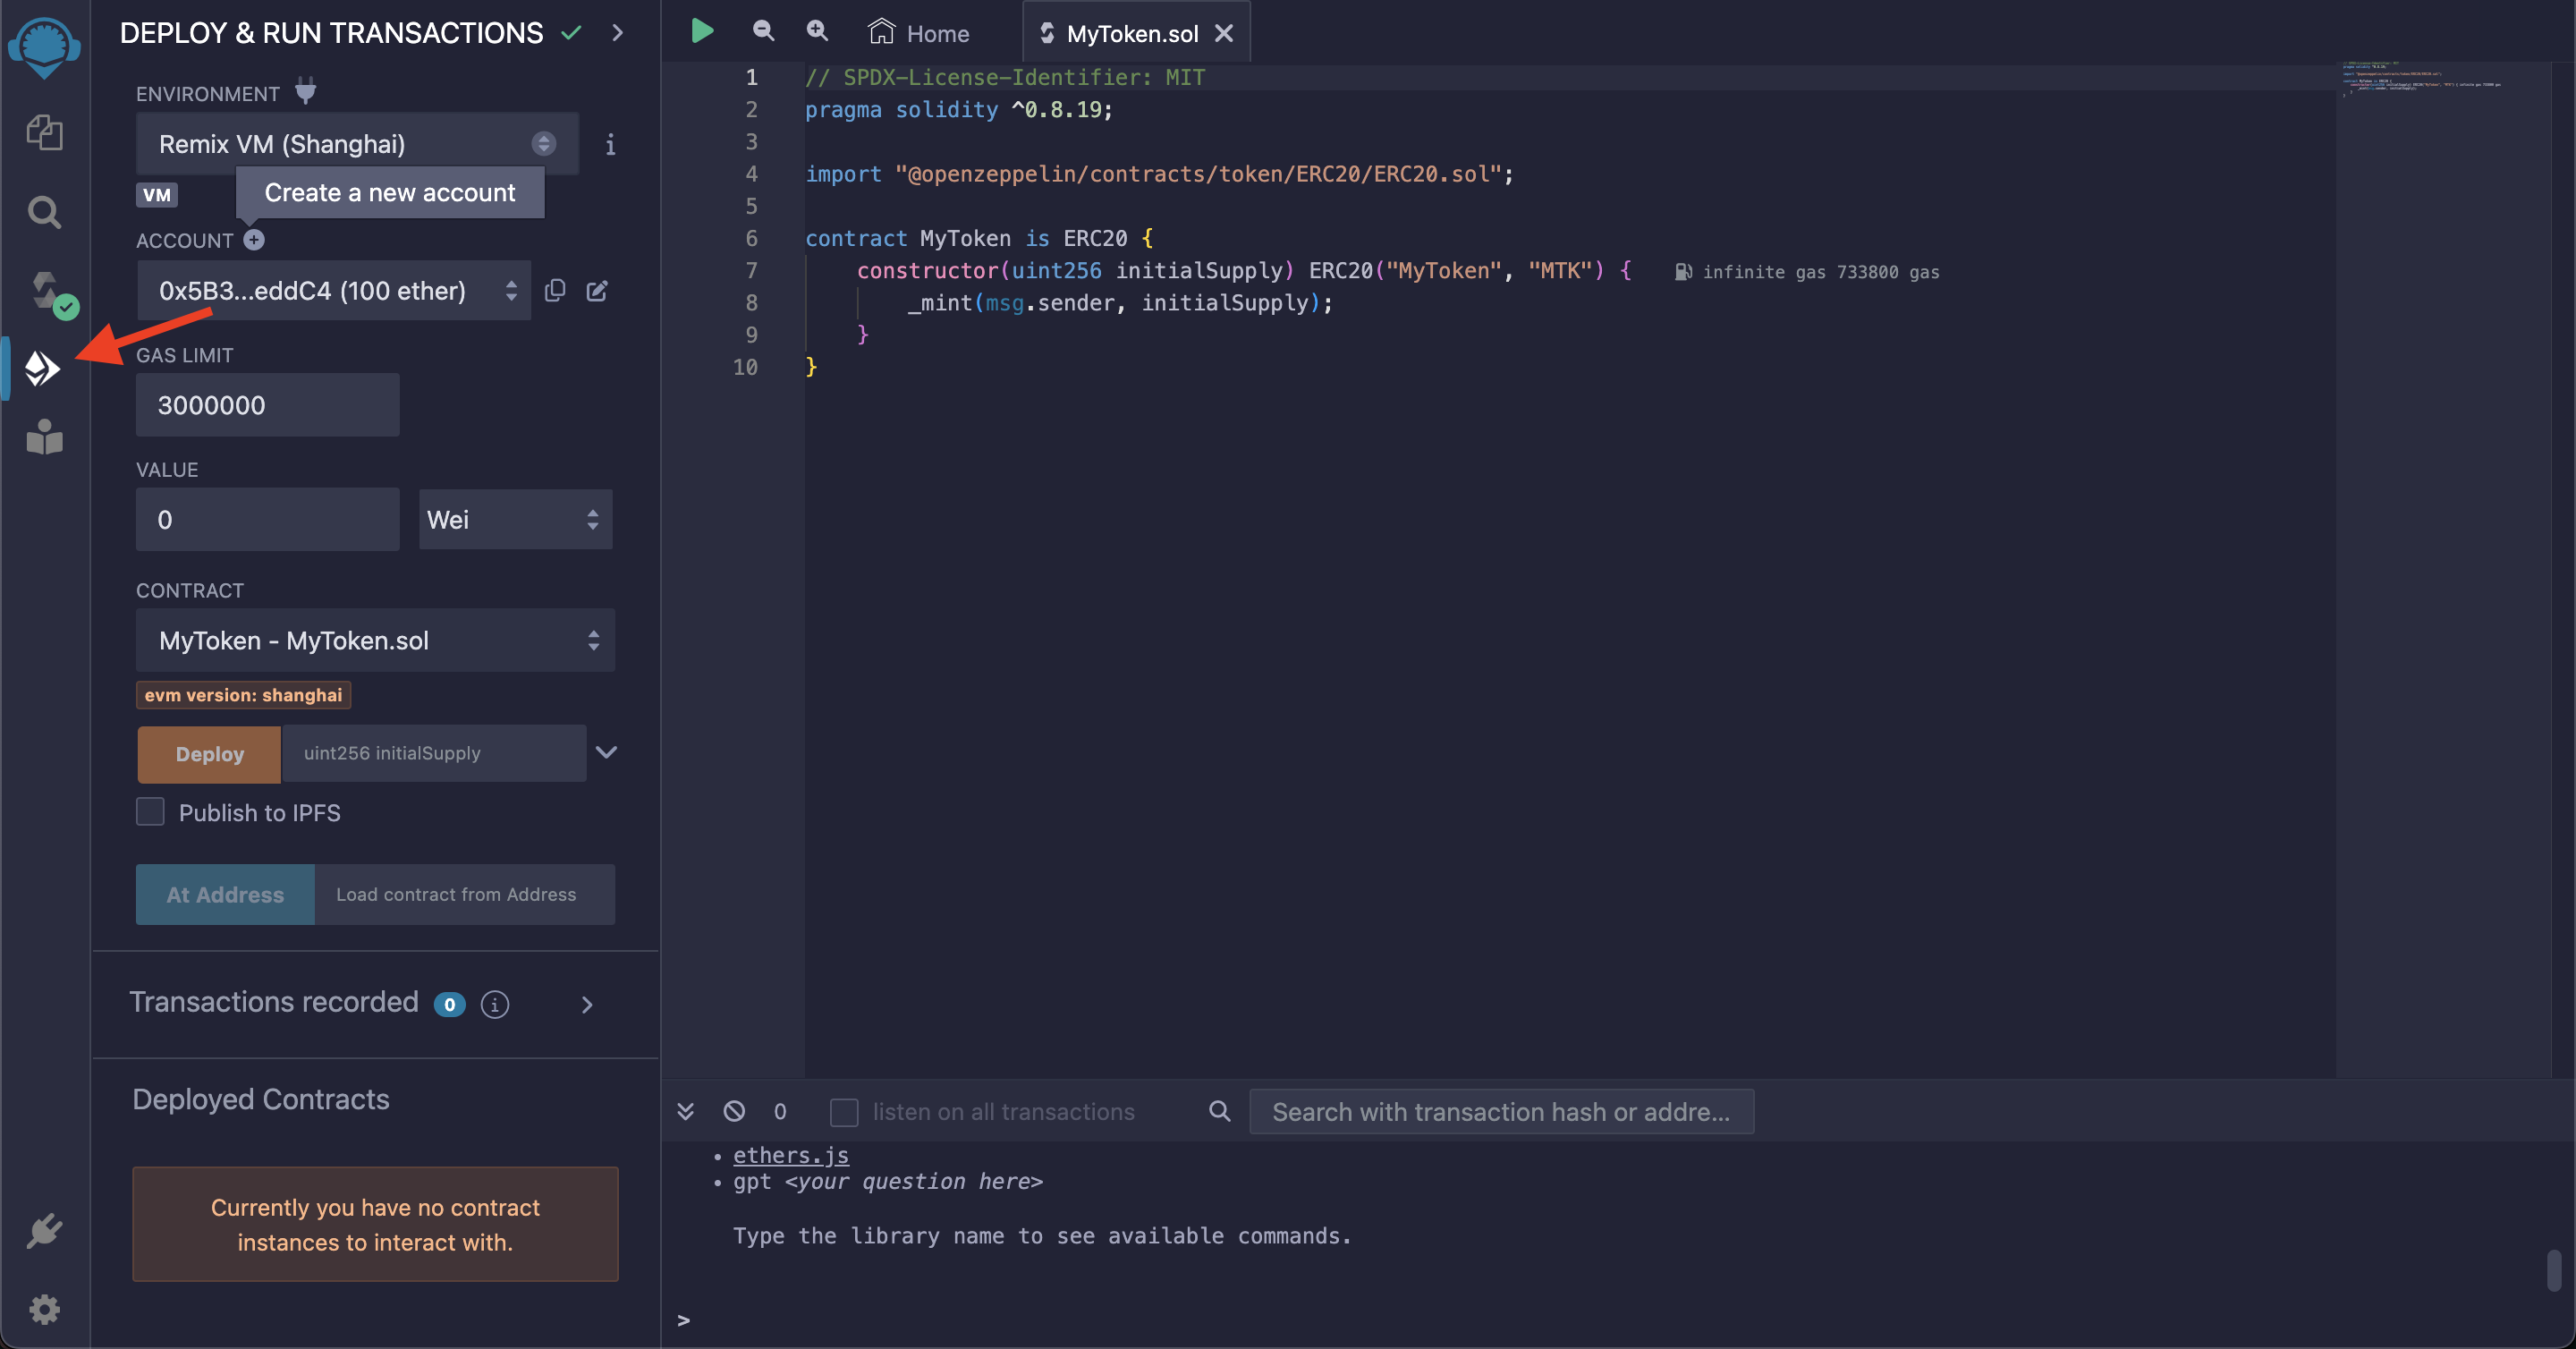
- Choose
Deploy and Run Transactionsand inEnvironment, Choose "Injected Provider - Metamask".
This loads the Metamask wallet.
Now click on Transactions recorded interact with the Smart Contract! Call its functions, send transactions, and observe the results. Ensure you have enough tRBTC in your MetaMask wallet for transaction fees.
- Monitor Transactions
- Use Remix and MetaMask to monitor transaction confirmations and results.
- You can also use a Rootstock Testnet Explorer to view transactions and contract interactions.