Blockmason
Using RSK with Blockmason Link
RSK is an open source, Ethereum compatible, Smart Contract platform secured by the Bitcoin Network. RSK adds value and expand functionality to the Bitcoin ecosystem by providing smart contracts and greater scalability.
In this onboarding example, we will deploy a smart contract to the RSK Testnet.
Setup
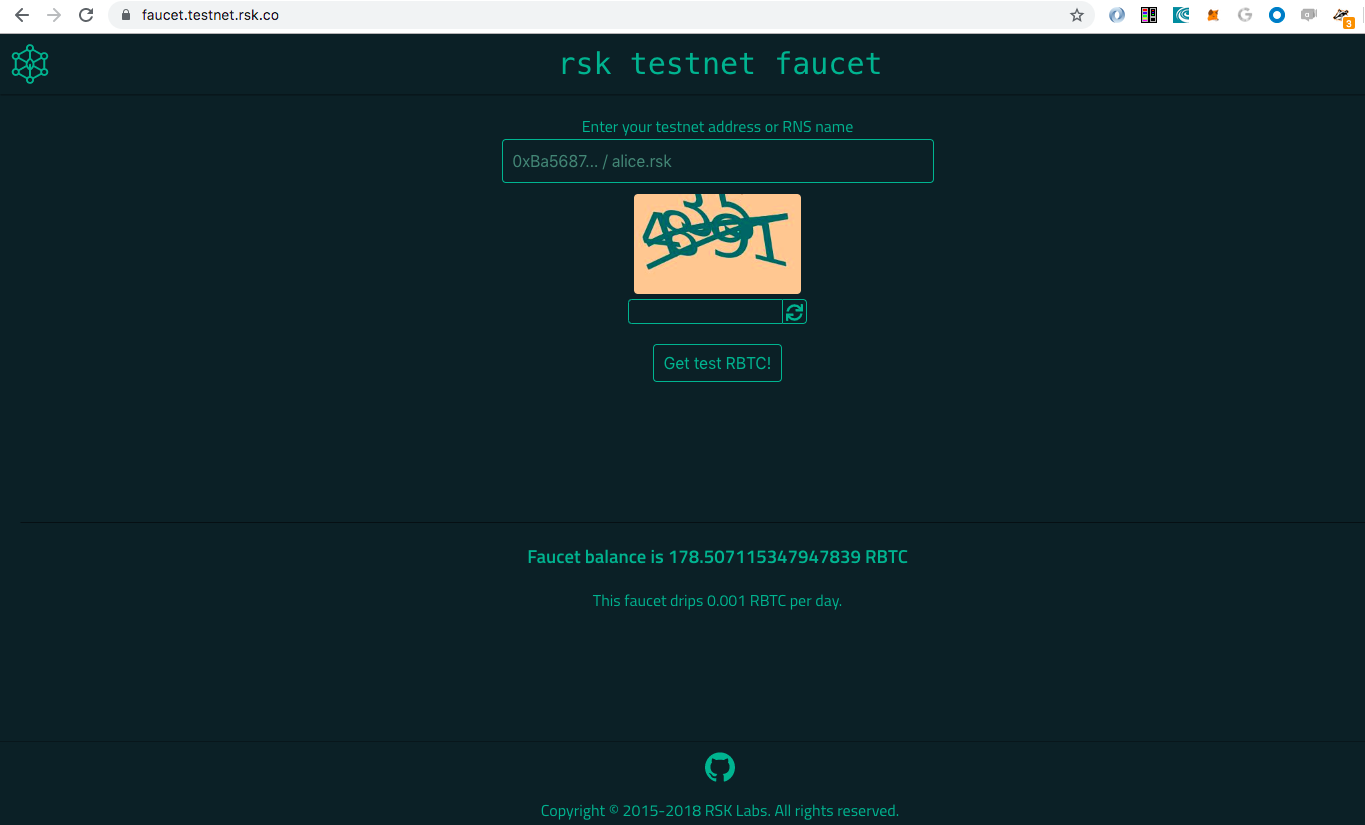
You can obtain some Testnet RBTC tokens from RSK Testnet Faucet to be sent to your Link default account address:
API project setup in Link
1. In Link, open up the setting dropdown menu and select New Project which starts the new project wizard.
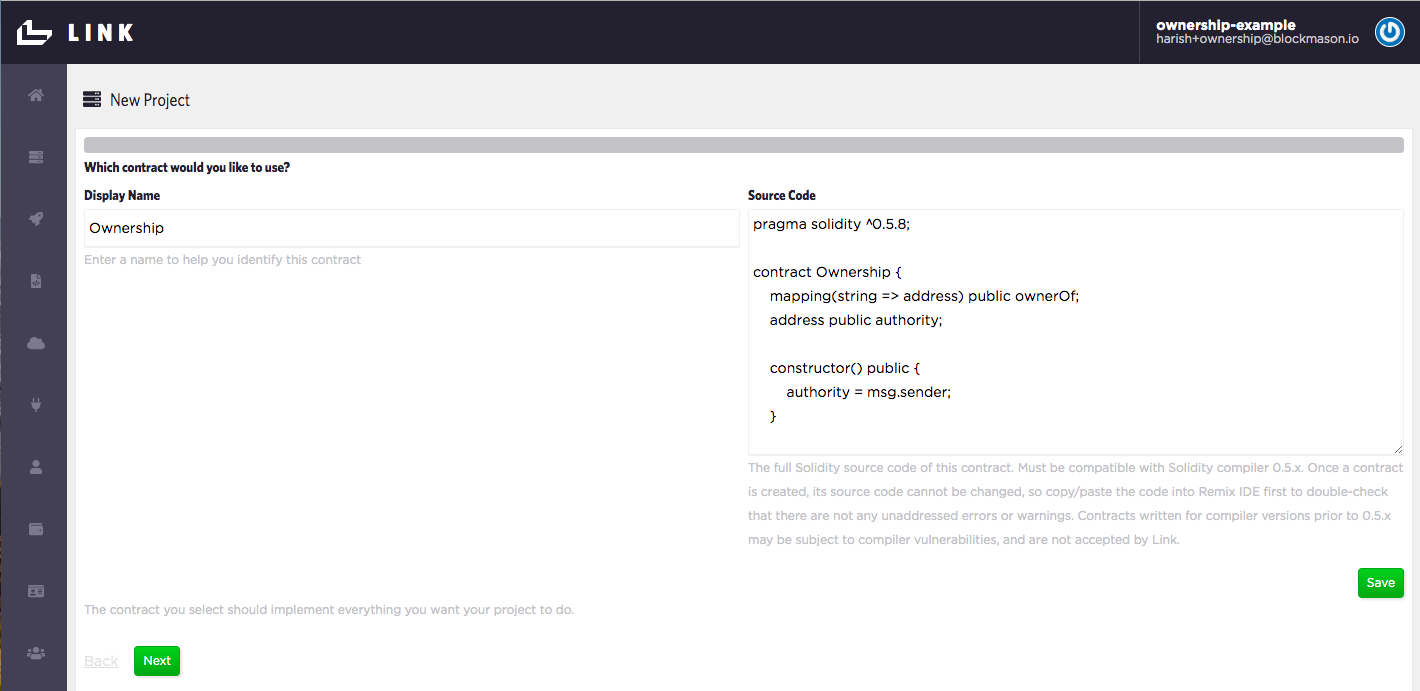
2. Under Which contract would you like to use?, select Ownership if the contract already exists, or select Create new and then copy and paste the Ownership.sol code into the Source Code field. Set the Display Name as Ownership. Press Save and Next.
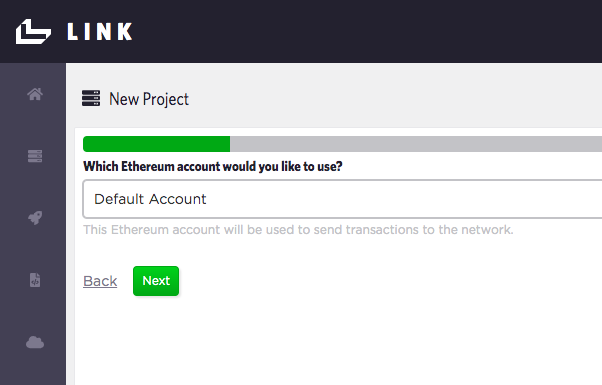
3. Under Which Ethereum account would you like to use?, use the Default Account. This is the account we seeded with test RBTC tokens as part of the setup.
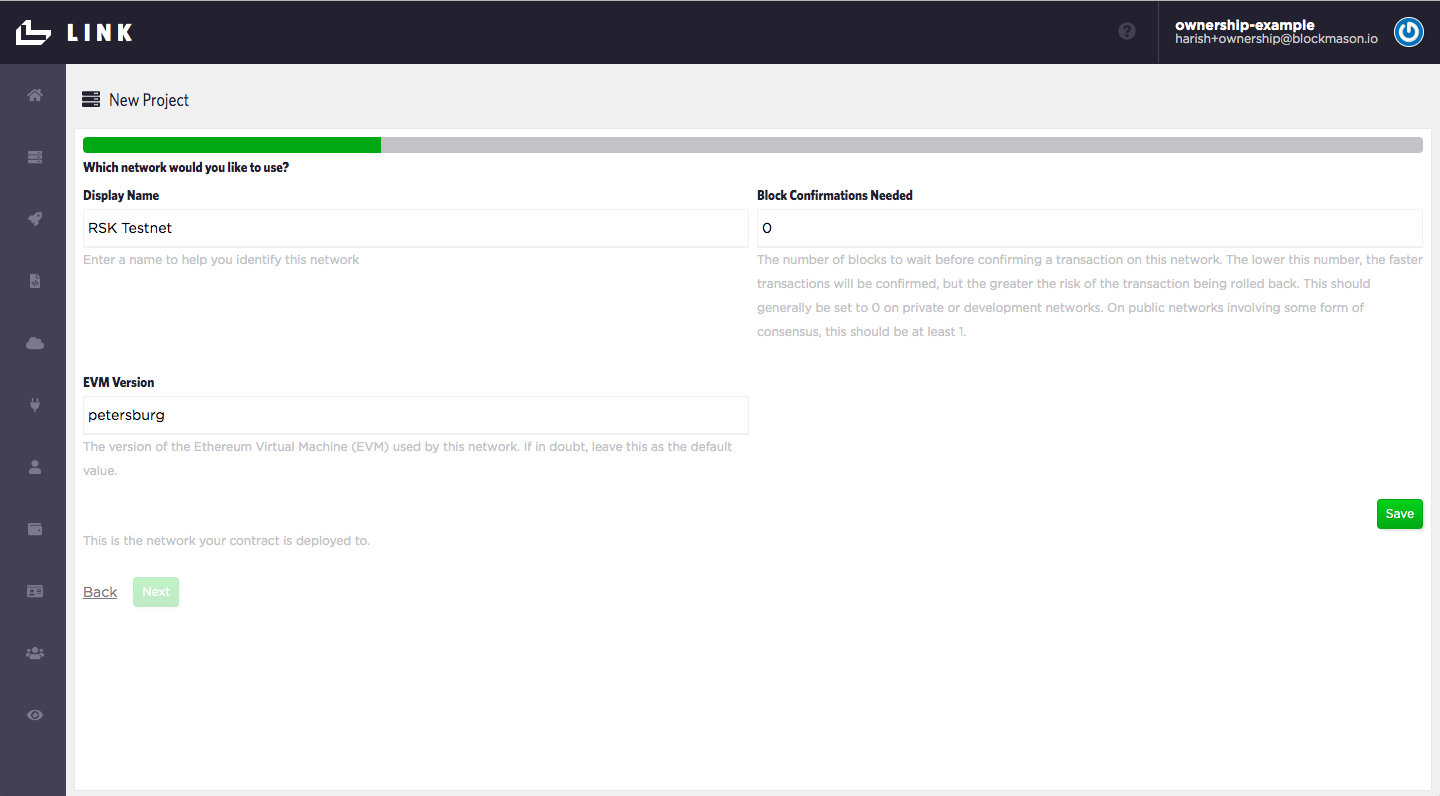
4. Under Which network would you like to use?, select Create new and call it RSK Testnet. Keep the Block Confirmations Needed at 0. Press Save and Next.
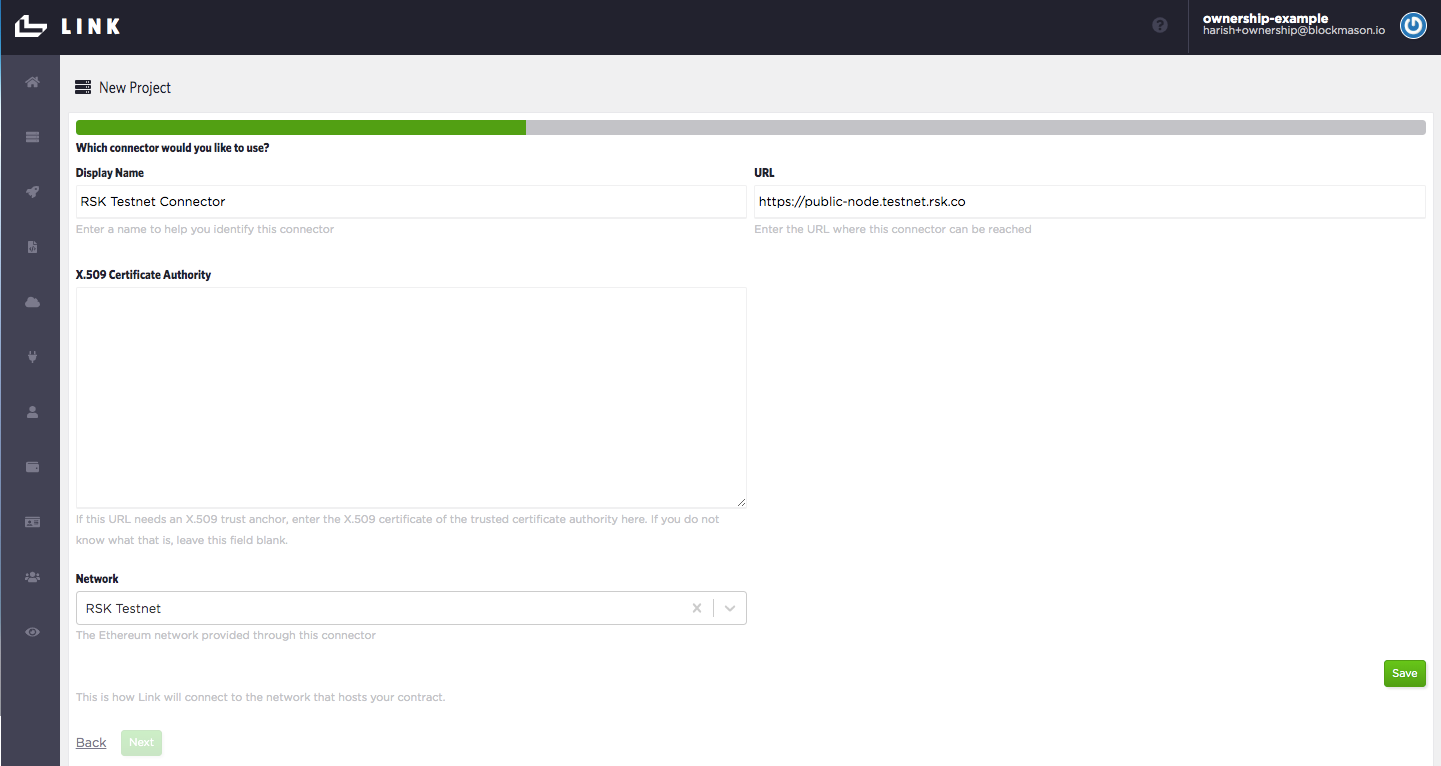
5. Under Which connector would you like to use?, select Create new. Call this connector RSK Testnet Connector and use the URL https://public-node.testnet.rsk.co (see Public Nodes for more details). Ensure the Network selected is RSK Testnet. Press Save and Next.
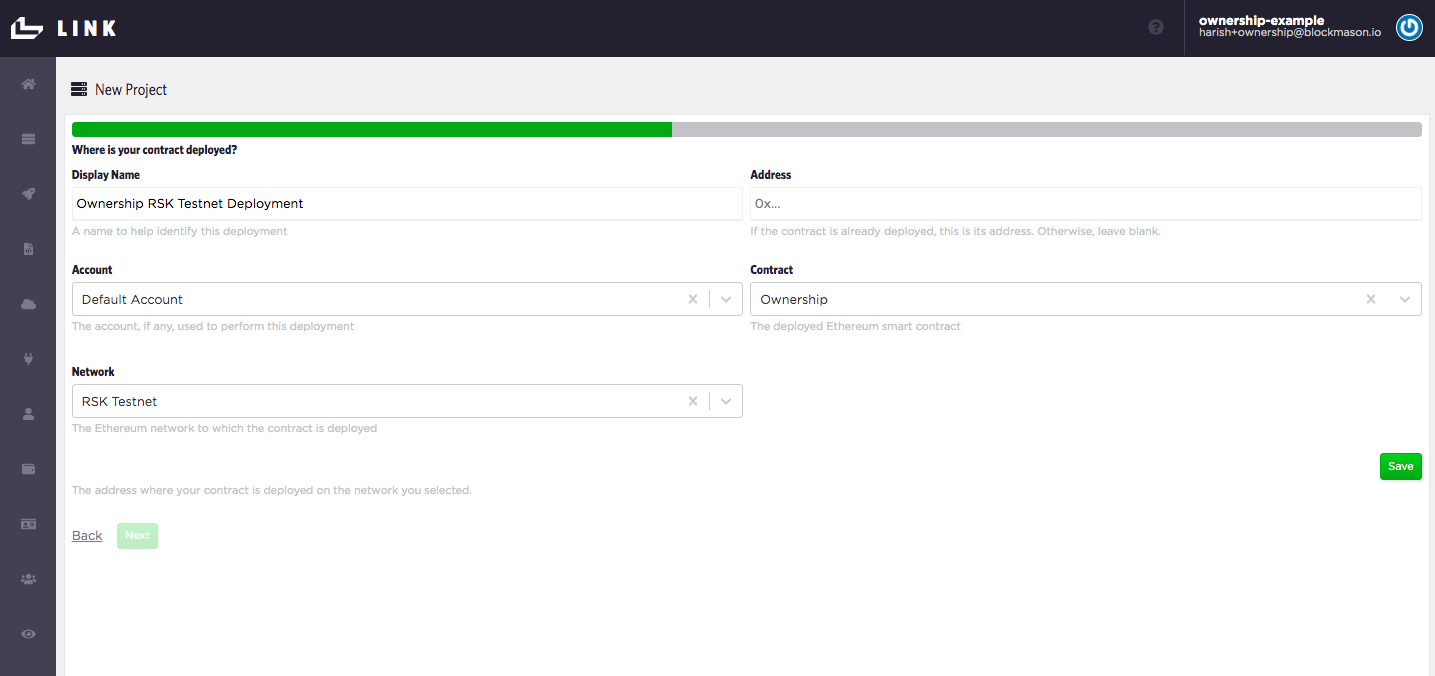
6. Now we just need to label our Deployment. Under Where is your contract deployed?, select Create new. Call this deployment Ownership RSK Testnet Deployment. Since we do not have an existing contract deployment, leave the Address field blank. Ensure the Account is the Default Account, the Contract is the Ownership contract and the Network RSK Testnet. Press Save and Next.
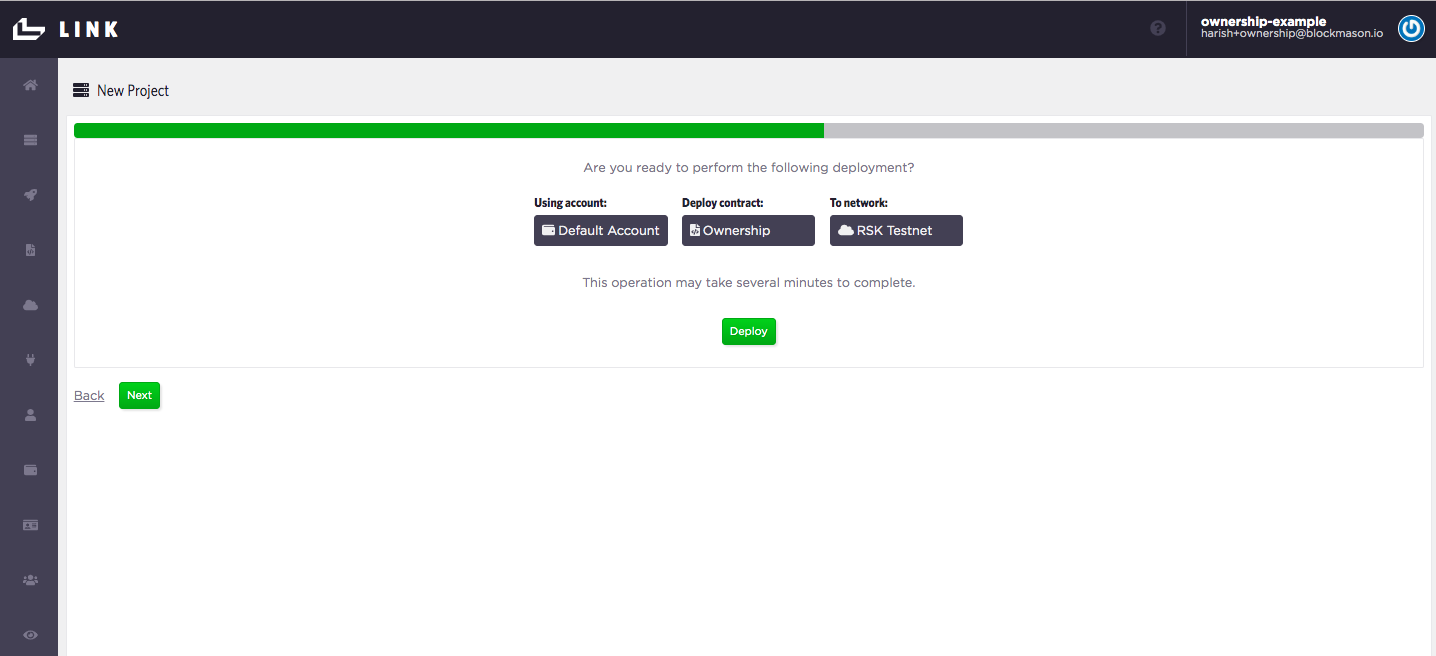
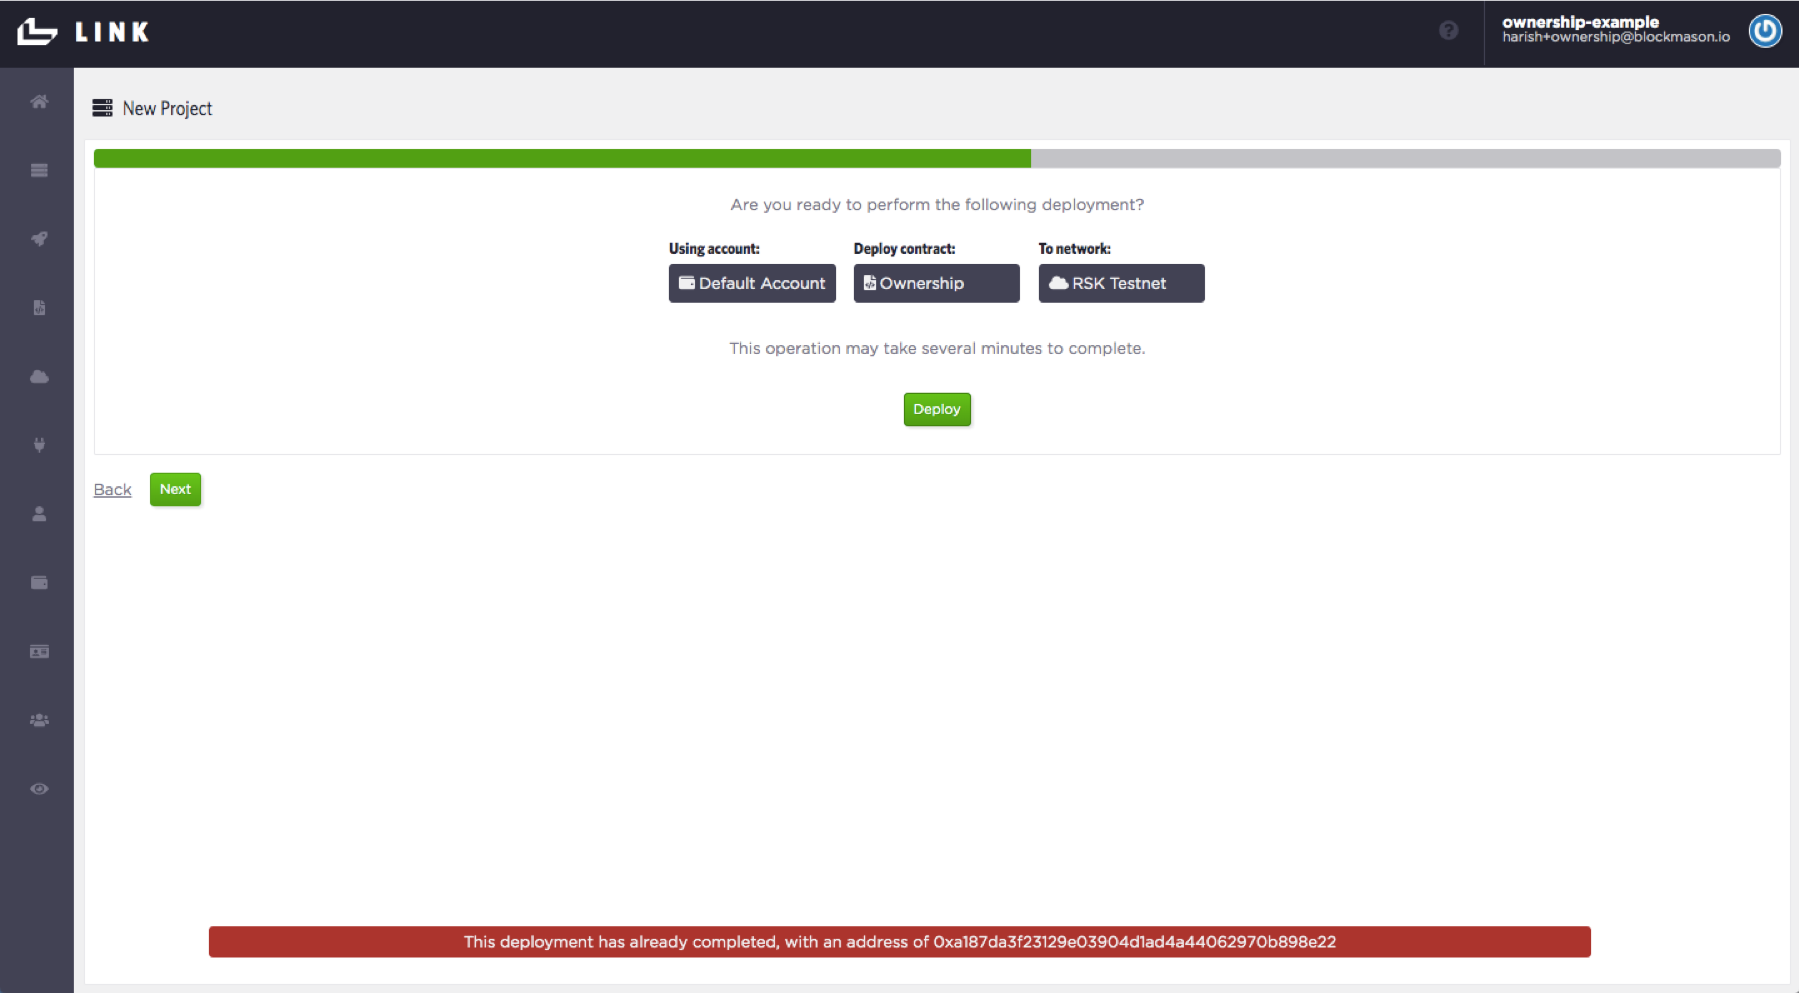
7. Now we're ready to deploy our contract to the RSK Testnet. Press Deploy and you should get a deployment in progress indicator icon. This might take up to a minute to complete. If deployed correctly, you'll proceed to the next step to set up your API.
If you get a
failed-to-fetcherror after you have waited a minute, try toDeploythe contract again - you will likely see the contract is already deployed and at what address. If this is the case, simply pressNextto continue the process.
8. Now we label our Ownership contract API. Under Name, call it ownership-rsk-testnet Also add in a human-readable display name. Ensure you are using the correct Contract Deployment. Press Save and Next.

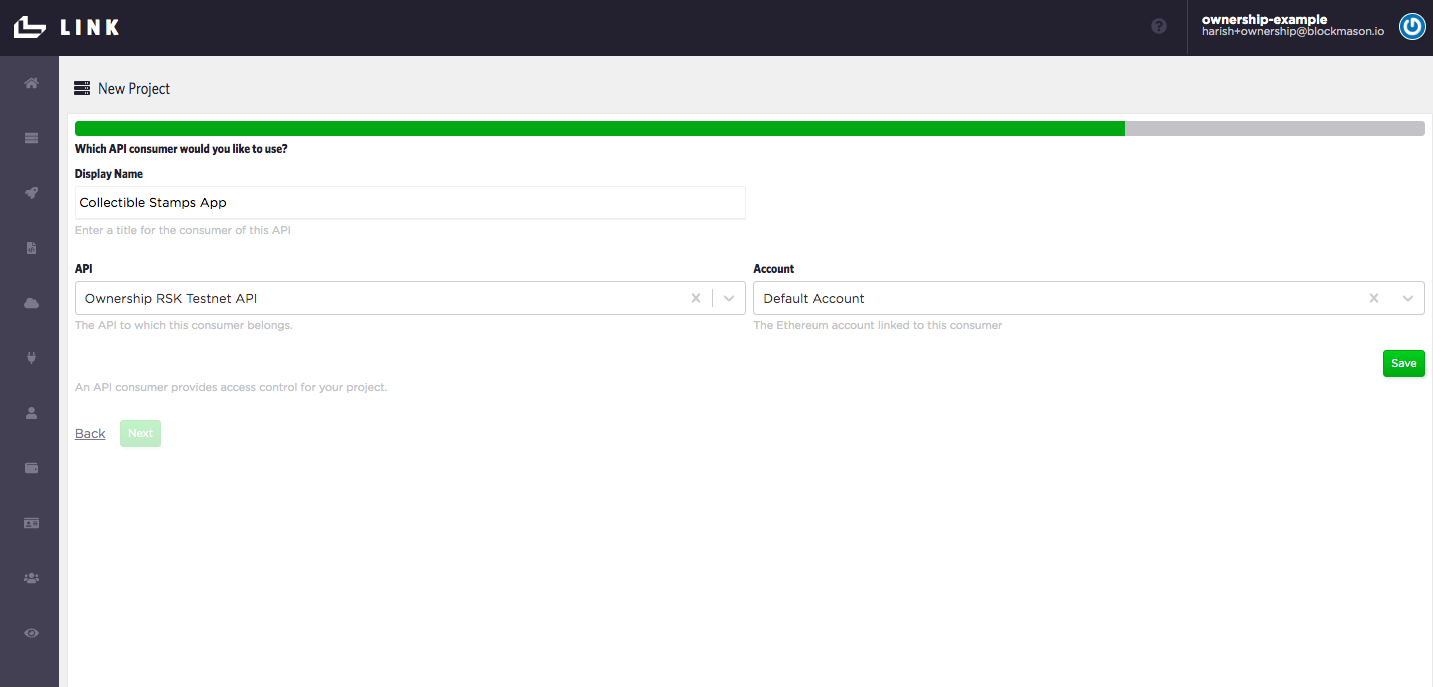
9. Now we label our Ownership API Consumer. This would normally be the name of the app or service calling the API. For example, let's call the consumer Collectible Stamps App. Ensure you are using the correct API and Account. Press Save and Next.
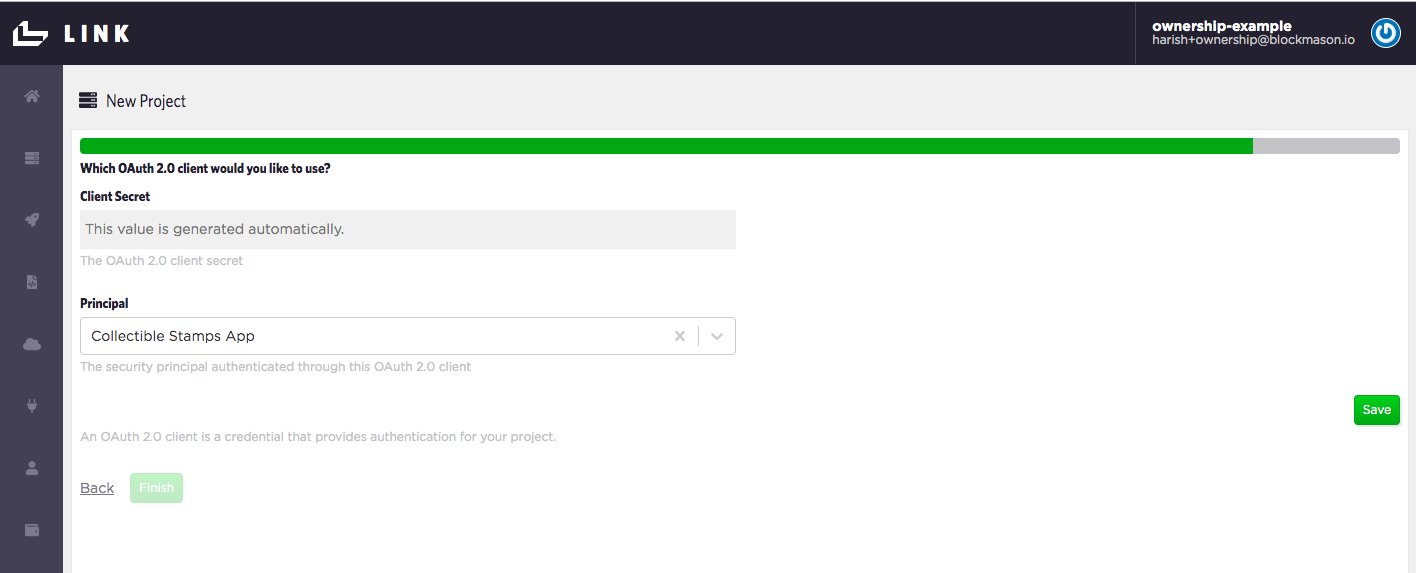
10. Lastly, your consumer needs to authenticate with the Ownership API. An OAuth2.0 Client Secret is automatically generated. Ensure you are using the correct Principal/Consumer. Press Save, Next and then Finish.
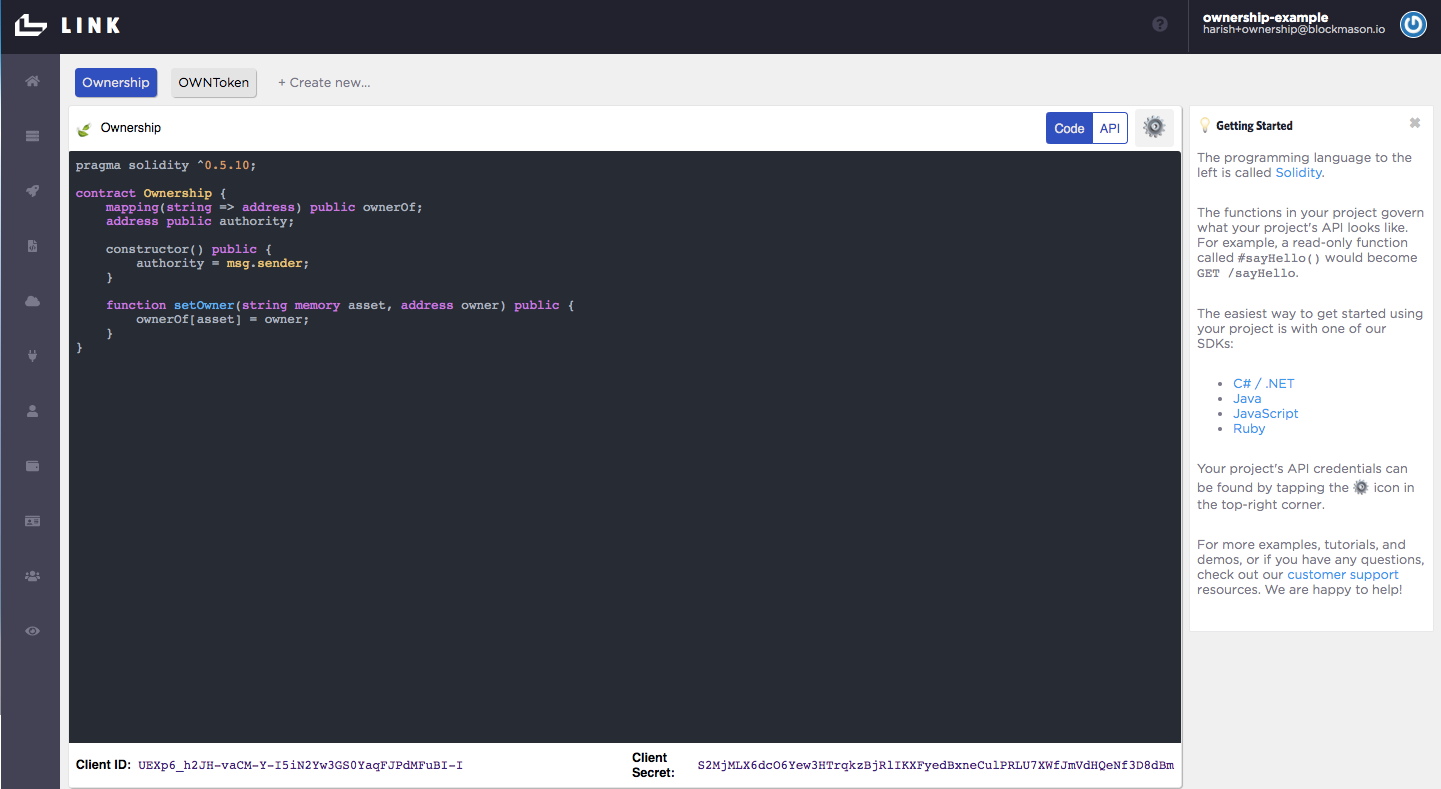
Once you hit Finish, you should end up back at Home page and see your Ownership code in the IDE, the API tab and a gear icon containing the client_id and client_secret at the bottom of the page which you will use in your app.
Let's also check that our Ownership contract deployed correctly on the RSK Testnet. Click on the Ethereum Contract Deployments menu item to see a list of contract deployments and their addresses. Copy and paste the address of the Ownership RSK Testnet Deployment into the RSK Testnet explorer https://explorer.testnet.rsk.co/ to see the details of your contract deployment.
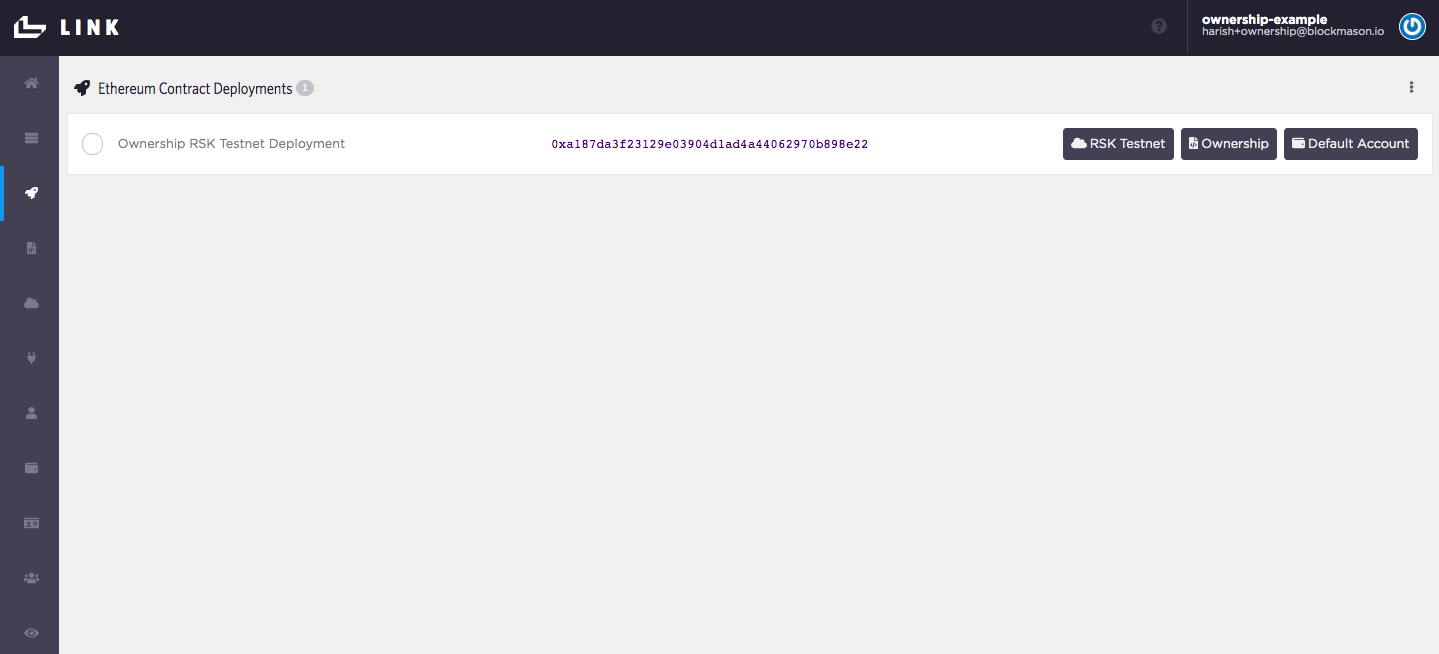
In the above example, the contract address on the RSK network is 0xa187da3f23129e03904d1ad4a44062970b898e22.
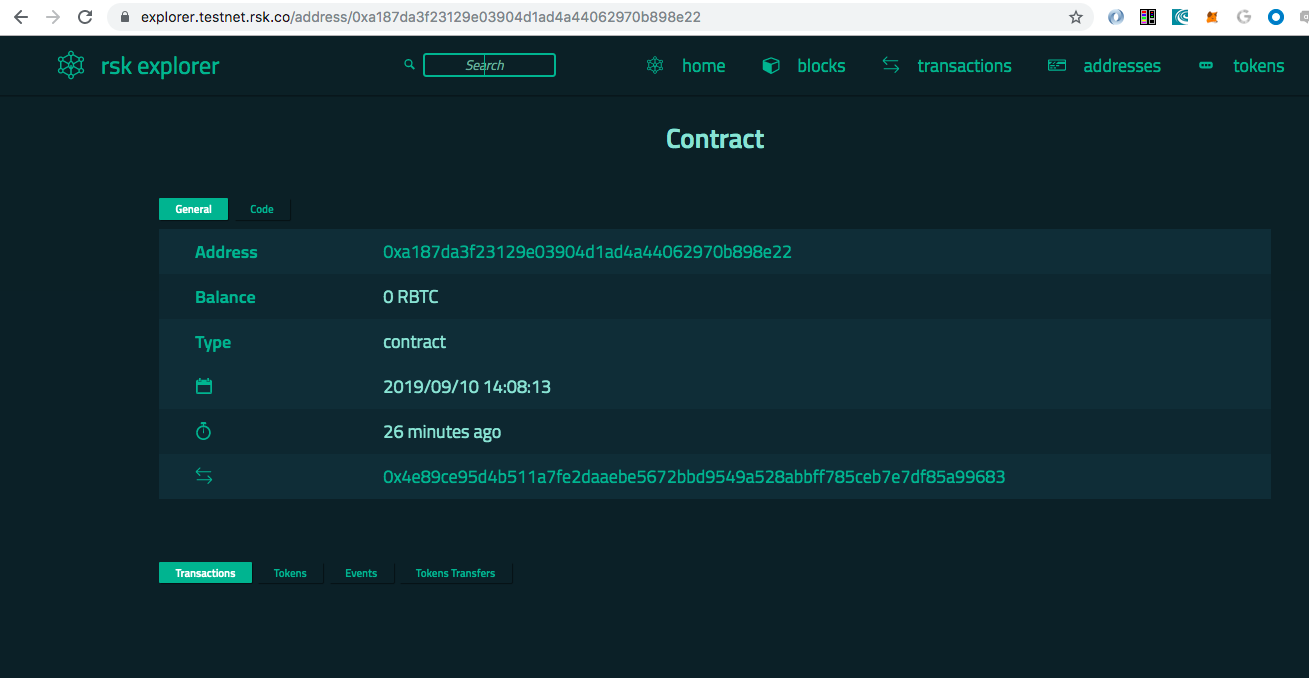
And we see our contract deployed on RSK!
Now you can go ahead and use the API endpoints which are linked to the Ownership smart contract deployed on RSK Testnet!
Test Ownership API endpoints
A simple JavaScript file using the Link JavaScript SDK in a Node environment can be found here:
https://github.com/blockmason/link-onboarding/blob/master/ownership-link-sdk-demo.js
First, run
npm installfrom your Terminal to install thenode-fetchand@blockmason/link-sdkdependencies (seepackage.json).
Then, in
ownership-link-sdk-demo.js, update theclientIDandclientSecretfor authentication.
Finally run the
ownership-link-sdk-demo.jsscript using Node from the Terminal. You should see an output in Terminal similar to the following:

Check your Ownership contract using the RSK Testnet Explorer to confirm the new transactions representing the
setOwner()andgetOwner()function calls.
Deploying to RSK Mainnet
If you want to deploy on the RSK Mainnet, just follow the same steps above with the following differences:
- Acquire mainnet RBTC tokens to send to your Link default account wallet
- Use the use the appropriate RSK Network public nodes RPC URL for Mainnet.